基于Intel/Apple Silicon Mac的SO-VITS-SVC 4.0和4.1本地推理
简介
SO-VITS-SVC 项目是语音合成和转换领域的前沿实践,特别针对歌声转换应用。该项目借助变分推断与对抗学习 (VITS) 模型的能力,使用户能够将口语或歌声音频转换为不同角色或人物的声音。
SO-VITS-SVC 项目主要面向深度学习及语音合成领域的爱好者、研究人员和对此类技术感兴趣的业余爱好者,让他们能够进行声音转换、语音属性修改(如音色、音高、节奏)等实验。这个项目为用户提供了一个将深度学习理论知识转化为实际应用的工具平台,尤其适用于想尝试将普通语音或歌声转换为动漫角色声音的人群。
本教程将介绍如何在 Mac 平台使用 CPU 运行该项目的推理过程。
本教程参考了来自 bilibili 的视频及实践。
以下是参考视频和文档:
-
B 站 @羽毛布団 所制作的 “So-VITS-SVC 4.1 整合包使用全指南”:
https://www.yuque.com/umoubuton/ueupp5 -
CSDN 上的 So-VITS-SVC 4.1 使用记录(详细):
https://blog.csdn.net/qq_17766199/article/details/132436306
-
目前不考虑在 Mac 上进行训练,只要能预处理和推理就很好了。也许有可能运行 LLM,如果有人在 Mac (MPS) 上成功训练过,请告诉我。
-
本教程主要针对已在他处训练并已下载到本地的模型进行推理的步骤。我已进行测试,可以正常运行。
-
有关训练的详细信息请参考上面的视频教程,非常详细。训练的关键在于数据集,同时需要耐心。
本教程仅用于交流和学习目的。请勿将其用于非法、不道德或不合乎道德的用途。
请确保自行解决数据集相关的授权问题。对未获授权数据集进行训练以及由此产生的后果,由使用者自行承担全部责任。本仓库及其维护者(svc develop team)不对此产生的后果负责,也不与之产生任何关联。
严禁用于任何与政治相关的用途。
软件要求:
- Homebrew https://brew.sh/
- VScode (可选)
- Python3
对于 SO-VITS-SVC 4.0,请安装 So-Vits-SVC-Fork,以避免因缺少包导致的错误:
1 | brew install [email protected] |
对于 SO-VITS-SVC 4.1,为防止在使用 WebUI 时与 Python 3.11 不兼容:
1 | brew install python3.10 |
根据自己的需求选择模型,不需要同时安装两个版本。
SO-VITS-SVC 4.0 推理步骤
1. 创建虚拟环境
Create a virtual environment
1 | python3 -m venv myenv #change 'myenv' to a different name |
2. 进入虚拟环境
1 | cd myenv |
1 | source bin/activate |
3. 安装依赖包
1 | python -m pip install -U pip setuptools wheel |
4. 启动服务
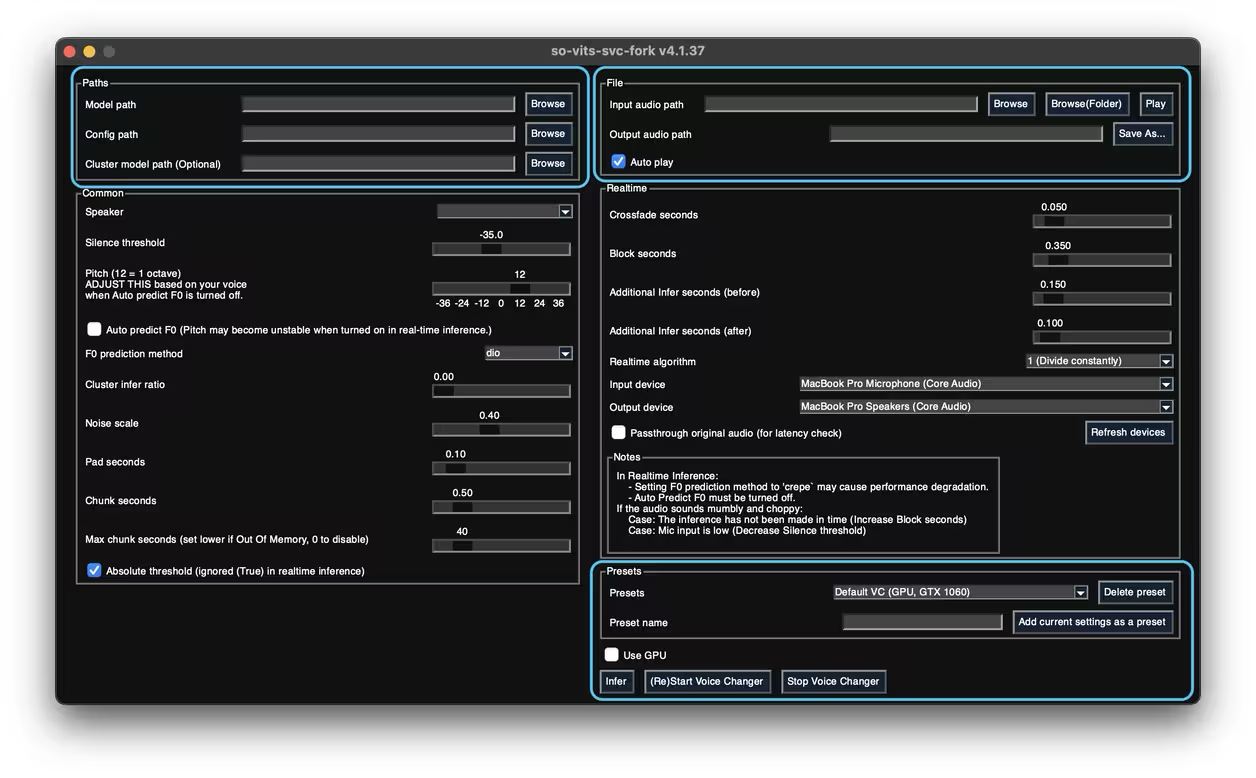
1 | svcg |
- Turn off “Use GPU.”
- Click “infer” to start inference.
- Try “F0 predict.”
- The 4.1 model was not successfully tested here, so use webui.
SO-VITS-SVC 4.1 推理步骤
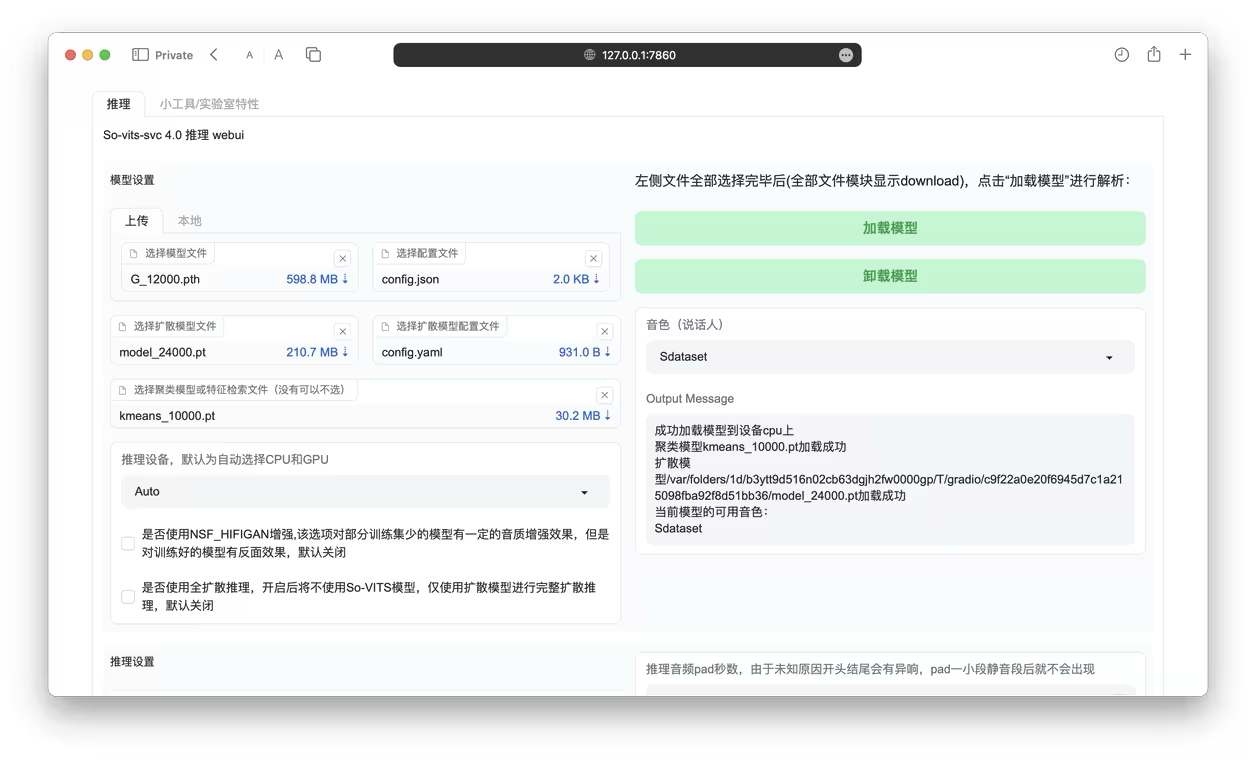
使用官方仓库提供的 WebUI: https://github.com/svc-develop-team/so-vits-svc
1. 创建虚拟环境
Create a virtual environment
1 | python3.10 -m venv myenv #myvenv 自己换个名字好了,python3.9也是可以的 |
2. 进入虚拟环境
1 | cd myenv |
1 | source bin/activate |
3. 克隆仓库
1 | git clone https://github.com/svc-develop-team/so-vits-svc.git |
4. 进入目录
1 | cd so-vits-svc |
5. 安装依赖
1 | pip install -r requirements.txt |
6. 启动 WebUI
(进入 WebUI 后如果无法加载模型是正常现象)
1 | python webUI.py |
如遇到 WebUI 相关报错,可限制依赖版本:fastapi==0.84.0, gradio==3.41.2, pydantic==1.10.12。使用以下命令升级包:
1 | pip install --upgrade fastapi==0.84.0 |
7. 下载缺失文件
(different files may be missing depending on the model)
The main missing files are in the pretrain folder. Add files according to the command line errors. You can download the necessary files from the cloud training server or download them from the provided links.
Configuration used currently:
1 | # By default, use 768 with volume embedding |
Source: kiss丿冷鸟鸟
缺失文件主要在 pretrain 文件夹内,请根据命令行报错信息依次添加。
Example of meta.py file structure:
1 | . |
总结
-
在 Mac 上,MPS 仍存在一些问题,因此目前只能在 CPU 上运行。不过,它至少还能工作。由于技术有限,只能做到这一步。使用 Windows 和 Nvidia 显卡的用户将获得更舒适的体验。
-
Model: 训练效果相当不错。你不需要长时间训练。在服务器上花几个小时就足够了(取决于数据集)。用于训练的所有数据集都是由 Elevenlab 生成的合成数据,质量相当不错(用于文本推理)。对于 TTS,推荐使用 Fish-Speech 和 Bert-Vits2(适合中文)。
感谢您的阅读。请指出本教程中的任何问题或更好的方法。
Version: 1.0
Banner: OPPO Reno 11 Pro Wallpaper


