Fix Moonlight Resolution Can't Change with Native Solution No Extra Downloads
Introduction
If you’ve been using Moonlight for game streaming and you’ve hit that frustrating issue where the resolution just won’t change—especially when using non-standard resolution devices like phones, tablets, or certain monitors—you’re definitely not alone. I ran into this problem myself and spent a while trying to figure out what was going wrong. After digging around and experimenting with a few fixes, I finally found the perfect solution. Best part? It doesn’t require any third-party software, virtual displays, or anything too complicated. It’s all done through the built-in tools on Windows and NVIDIA Control Panel. Here’s how I fixed it.
Note: this may not be the best solution for you, but for me this is the simplest version that works and changes the least amount of the computer’s settings. You can also try to find motified version of sunshine and moonlight or virtual display software. Please let me know if you have another solution here.
Requirement:
- HDMI Dummy Plug (I happened to have a few on hand, so I used them right away.)
Moonlight-ios-NativeMultiTouchPassthrough Version:
https://testflight.apple.com/join/1JDEKywe
Check Current Resolution
So, first things first—I needed to see what resolution my device was running at. This might sound obvious, but you’d be surprised how often this simple step gets overlooked. If you’re using something like a phone or tablet, chances are your device doesn’t have the same standard resolution that Moonlight expects. It might be running something like 3024x1964 or 2560x1600, which isn’t the same as what most monitors use.
Moonlight, by default, might try to run at 1920x1080 or something else that doesn’t really match your device’s capabilities. This is where the issue begins. Moonlight doesn’t play nice when it’s forced to work with an unusual resolution. So, I needed to figure out a way to make Moonlight recognize my custom resolution.
Find All iPhone, iPad, Apple Watch, iPod Touch resolution here:
https://iosref.com/res 👍
Set DSR in NVIDIA Control Panel
Note that I’m not sure if this part works, this step just seems to be on and off, I also learned this step from the internet, you can skip it if it’s already off.
After a bit of research, I learned that DSR (Dynamic Super Resolution) in NVIDIA Control Panel could help me get past this problem. What DSR does is allow your system to render at a higher resolution than your display can handle and then downscale it to fit. It’s like an “artificial” higher resolution, and it works really well for non-standard displays.
-
Open NVIDIA Control Panel: Right-click on your desktop and select NVIDIA Control Panel. You should have this installed if you’re using an NVIDIA GPU.
-
Go to Manage 3D Settings: In the control panel, find the Manage 3D Settings tab on the left-hand side.
-
Locate DSR Factors: Scroll down and find DSR - Factors. DSR allows you to choose different scaling options like 1.5x, 2.0x, and higher.
-
Enable DSR: I checked the 1.5x and 2.0x boxes (those seem to be the sweet spots for most resolutions). Click Apply.
-
Switch DSR On and Off: I found that toggling DSR on and off a couple of times helped reset the settings properly. After enabling DSR, I clicked Apply. Then I went back, unchecked everything, and clicked Apply again. This helped make sure the settings were fully recognized.
DSR can be a game-changer, especially when you’re dealing with devices that don’t have a “standard” resolution. Enabling this essentially opens up more options for me when trying to set a custom resolution in Moonlight.
Just remember it’s off after you change. DSR Facter should be off.
Creating a Custom Resolution
Creating your custom resolution. This is where you could set the exact resolution you wanted for my device.
Full Guide here: https://nvidia.custhelp.com/app/answers/detail/a_id/759/~/custom-resolutions
-
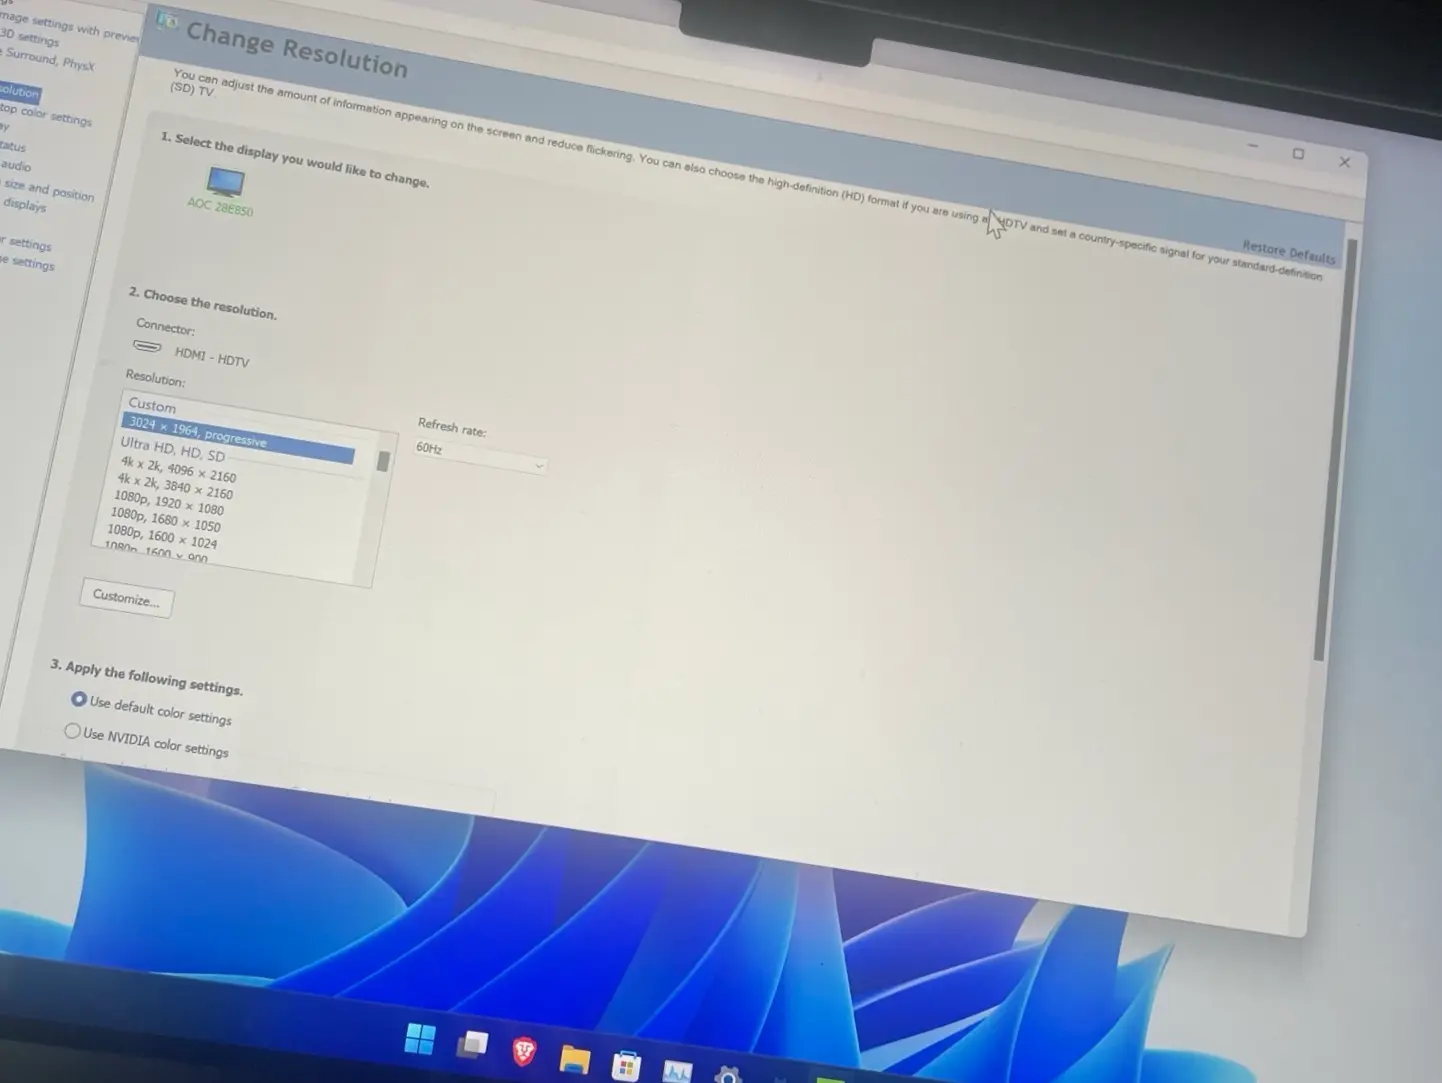
Go to Change Resolution: Back in NVIDIA Control Panel, you need to click on Change Resolution under the Display section.
-
Click Customize: Here, you’ll find an option to Customize the resolution. Click that, then select Create Custom Resolution.
-
Set Resolution Parameters: This is where you can enter your custom resolution. Input the horizontal and vertical pixel values based on what your device supports. For example, if your tablet supports 2560x1600, enter that. If your device supports a higher refresh rate, make sure to adjust that as well.
-
Test and Apply: Once you’ve entered the resolution, click Test to make sure it works. After testing, click Apply to save the settings.

Applying the Custom Resolution
At this point, you had created the resolution in NVIDIA Control Panel, but you needed to apply it in Windows Settings to ensure it would display correctly in Moonlight.
-
Right-click on Desktop: Right-click on your desktop and select Display settings.
-
Go to Advanced Display Settings: Scroll down and click on Advanced display settings.
-
Open Display Adapter Properties: Click on Display Adapter Properties to access the full list of available resolutions for your device.
-
Choose the Custom Resolution: Under List All Modes, find the custom resolution you just created and select it.
-
Apply the Resolution: Click OK and then Apply to make the changes take effect.
Verify Everything Works
Finally, you launched Moonlight and connected to your gaming PC. Lo and behold, you could see the new resolution applied to your device. Whether you were streaming to your phone or tablet, the custom resolution was now working perfectly. Everything looked smooth and sharp, just as it should.
A Few Final Tips
-
Don’t Modify Resolution in NVIDIA Control Panel Again: Once you’ve set your custom resolution, avoid going back and adjusting it in the NVIDIA Control Panel again. It can mess with your settings and lead to the resolution not being applied correctly.
-
Restart the Device: If things aren’t working right away, try restarting your device. Sometimes it takes a reboot for the changes to fully kick in.
Conclusion
In the end, fixing the Moonlight resolution can’t change issue was simpler than I thought. By disenabling DSR, creating a custom resolution, and then applying it through Windows Settings, I was able to get Moonlight working perfectly on my phone, tablet, and other non-standard resolution devices. No need for any third-party software or virtual displays—just using NVIDIA Control Panel and Windows Settings was enough.
I hope this guide helps you if you’re facing the same issue. If you have any questions or run into any problems, feel free to drop a comment. Happy streaming!
Reference
https://nvidia.custhelp.com/app/answers/detail/a_id/759/~/custom-resolutions
https://www.bilibili.com/video/BV1Na4y1J75f
https://blog.csdn.net/wangrui1573/article/details/129240001