How to Import a CSV from Umami Cloud to Self-Hosted Umami
Introduction
Umami offers a user-friendly interface and powerful website analytics, which makes it a popular choice for many developers and website owners. However, when it comes to longer-term data retention and more extensive domain analysis, the free version of Umami Cloud may not be enough. This tutorial will show you how to migrate your data from Umami Cloud to self-hosted Umami.
Youtube Video Tutorial
Github Repository
Huggingface Space
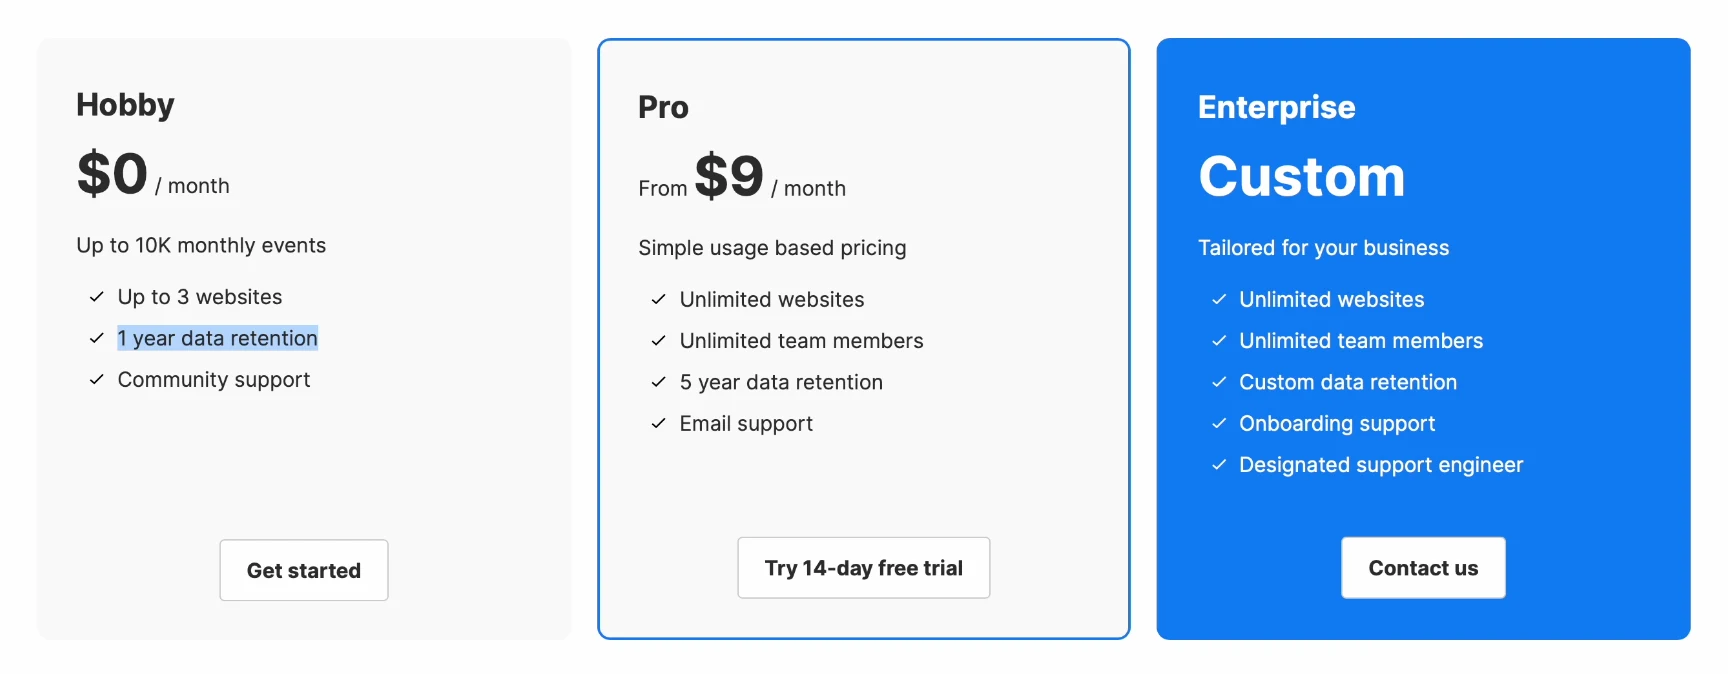
Why migrate?
The free version of Umami Cloud, while offering convenient hosting, has two distinct limitations:
- Data retention time limitation: data is only retained for one year, after which it will be automatically deleted.
- Domain name usage limitation: a maximum of three domain names can be analyzed.
Migrating to a self-hosted version is an ideal option for users who want to retain data and analyze multiple projects over time.
Step 1. Export Data
Exporting data from Umami Cloud
In order to transfer the data, you first need to export the csv data from Umami Cloud.
- Log in to your Umami Cloud account.
- Go to the Data Management page and select the website data you need to export.
- Umami will package the selected data and email a download link when it is ready.

Step 2. Data handling
Once you have downloaded the CSV files, you will need to process them using a Python script to make sure they are suitable for importing into the database. This script will help you prepare the data and make sure they are suitable for import into the self-deployed version of the database. You can download this script from GitHub or use Huggingface Space.
In Umami’s database, there are two main data types involved: website_event and session. A new site instance needs to be created and the old site ID replaced with the new site ID when importing data.
1 | pip install pandas |
1 | import pandas as pd |
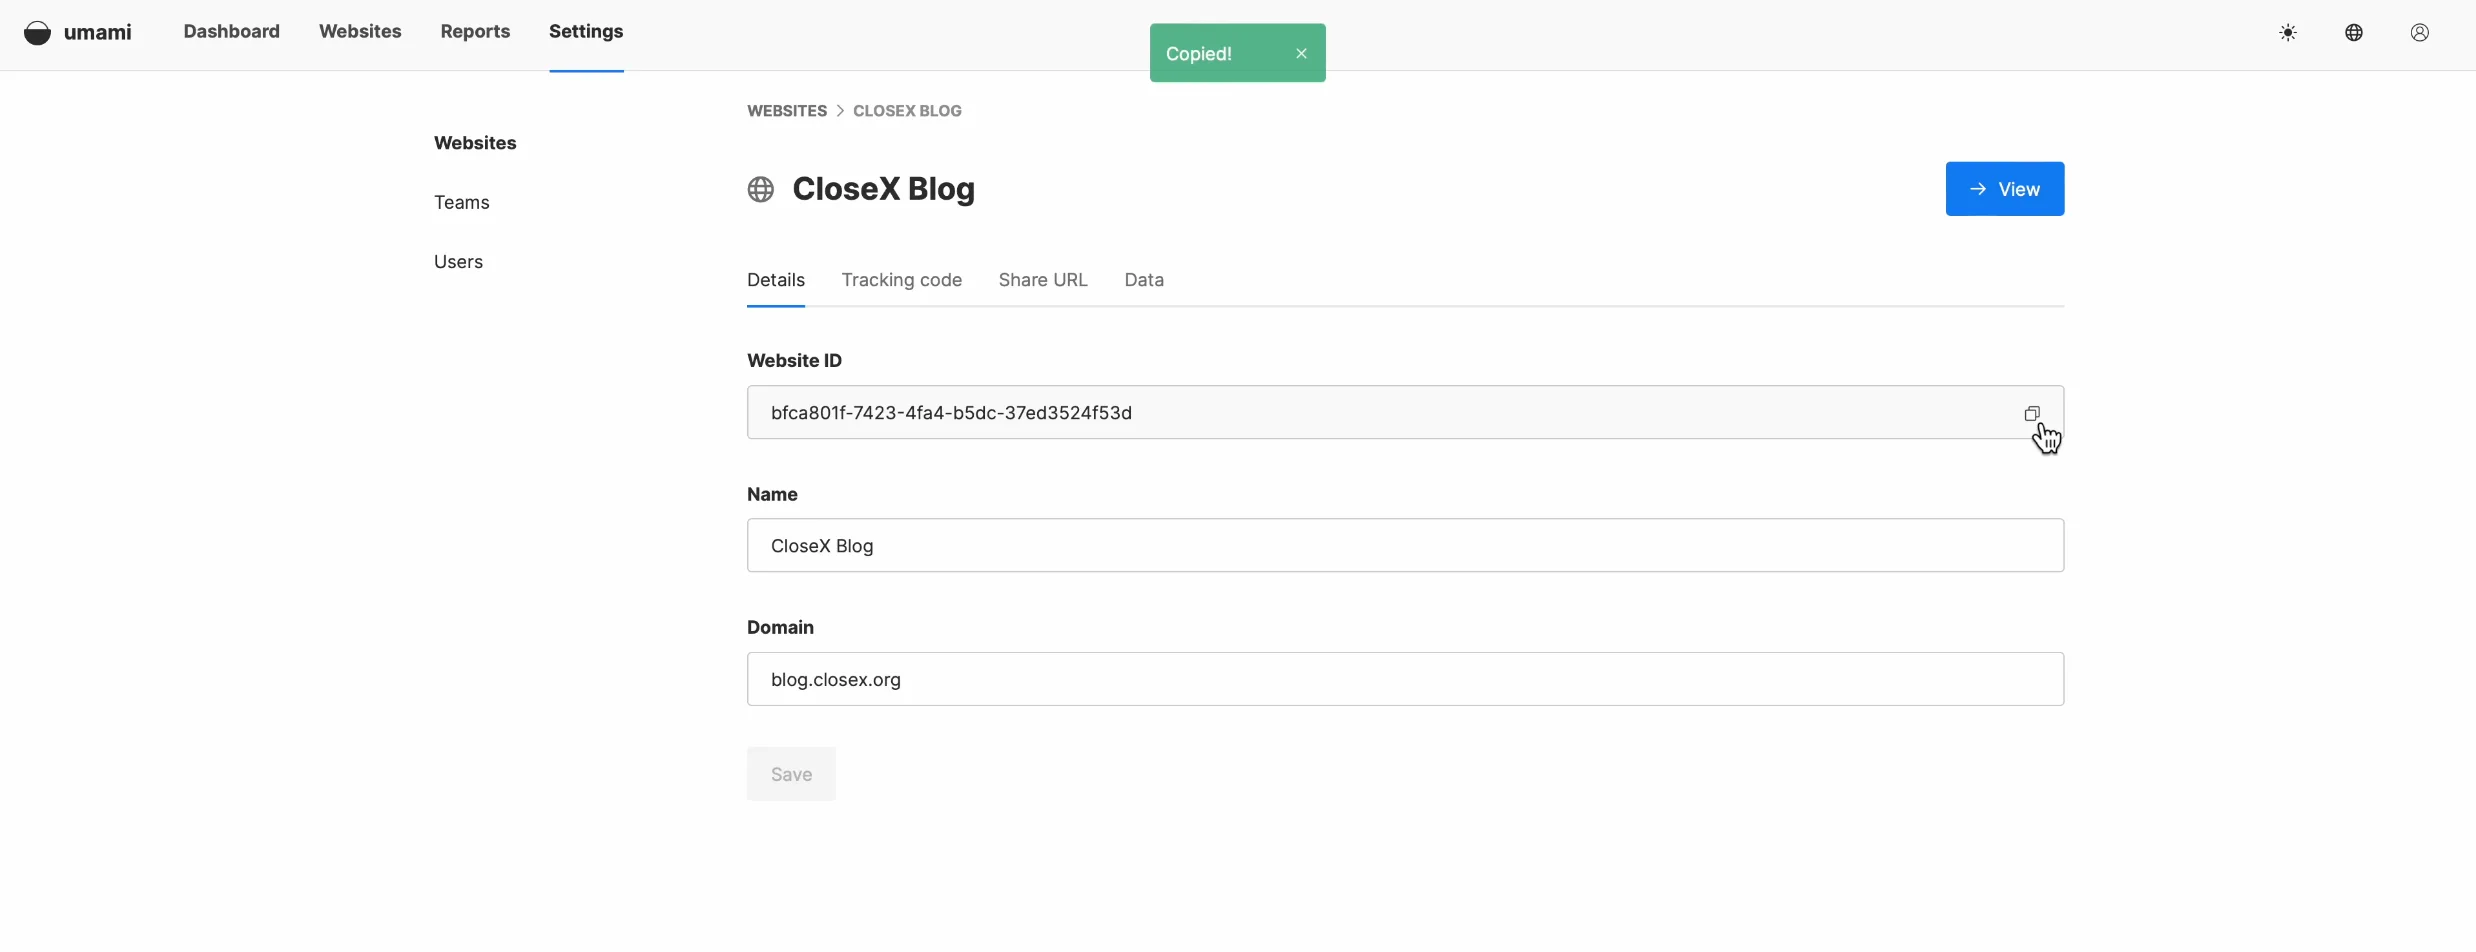
Before that, you need to replace your self-deployed Umami’s Website ID with your old Website ID on Umami Cloud. You can find the website id in the settings screen of the website.
After you’ve processed the data, you’ll see two files generated, which arewebsite_event.csv and seesion.csv
Step 3. Import data
Data can be imported via the SQL command line or by using a database management tool such as PG admin. Please refer to the tutorial link below for details on the import process.
You can try one of these methods:
Import CSV File into MySQL Table
https://www.mysqltutorial.org/mysql-basics/import-csv-file-mysql-table/
Import CSV File Into PostgreSQL Table
https://www.postgresqltutorial.com/postgresql-tutorial/import-csv-file-into-posgresql-table/
You can import website_event first and then import the session. We then switch to PGadmin and select the website_avent form to perform the data import. Once the files have been imported successfully, simply refresh your Mami interface, and you should see the new data appear.Next, we will do the session data import.There may be some issues encountered regarding session_id. In order to resolve this issue,we can directly remove the associated unique indexes via SQL commands.If you have a better way to deal with this or encounter any difficulties,please feel free to leave a message in the comment section below the article.
-
Remove Primary Key Constraint: This will allow duplicate
session_idvalues in the table. Execute the following command:1
ALTER TABLE session DROP CONSTRAINT session_pkey;
-
Remove Unique Index: Remove the uniqueness constraint on
session_idby executing the following command:1
DROP INDEX session_session_id_key;
After removing these constraints, your table will be able to accept duplicate session_id values. However, please note that primary keys and unique indexes are typically used to ensure data integrity and optimize performance, removing them may lead to other issues.
Some Basic Commands
-
View All Tables in PostgreSQL
1
\dt
If you want to see more detailed information (including table size, etc.), you can use:
1
\dt+
-
See how many rows are in the database table
1
SELECT COUNT(*) FROM session;
-
Delete specific rows
If you only want to delete rows that meet certain criteria (e.g., delete session data for a website_id)
1
DELETE FROM session WHERE website_id = '425f-95';
Conclusion
Finally, refresh the page again and you will see that all data has been displayed correctly. At this point, your data migration is complete and you are ready to start using the new tracking code.
It’s worth noting that many users have requested on GitHub that Umami add a feature to import data directly from the interface.I understand that the development team is considering this feature and hope to implement it in the near future.
https://github.com/umami-software/umami/issues/2653#issuecomment-2040970801
https://github.com/umami-software/umami/issues/2456
Thank you for reading and I hope this was helpful. Feel free to comment and discuss any questions or suggestions.